
Uncategorized
Custom Paint by Diamonds: Tips and Tricks
Diamond Painting Tips & Tricks: 20 Techniques for a Flawless Finish
It’s your first canvas or your fiftieth — either way, these diamond painting tips will make the work neater, faster and far more enjoyable, with honest fixes for the small problems every maker eventually hits.
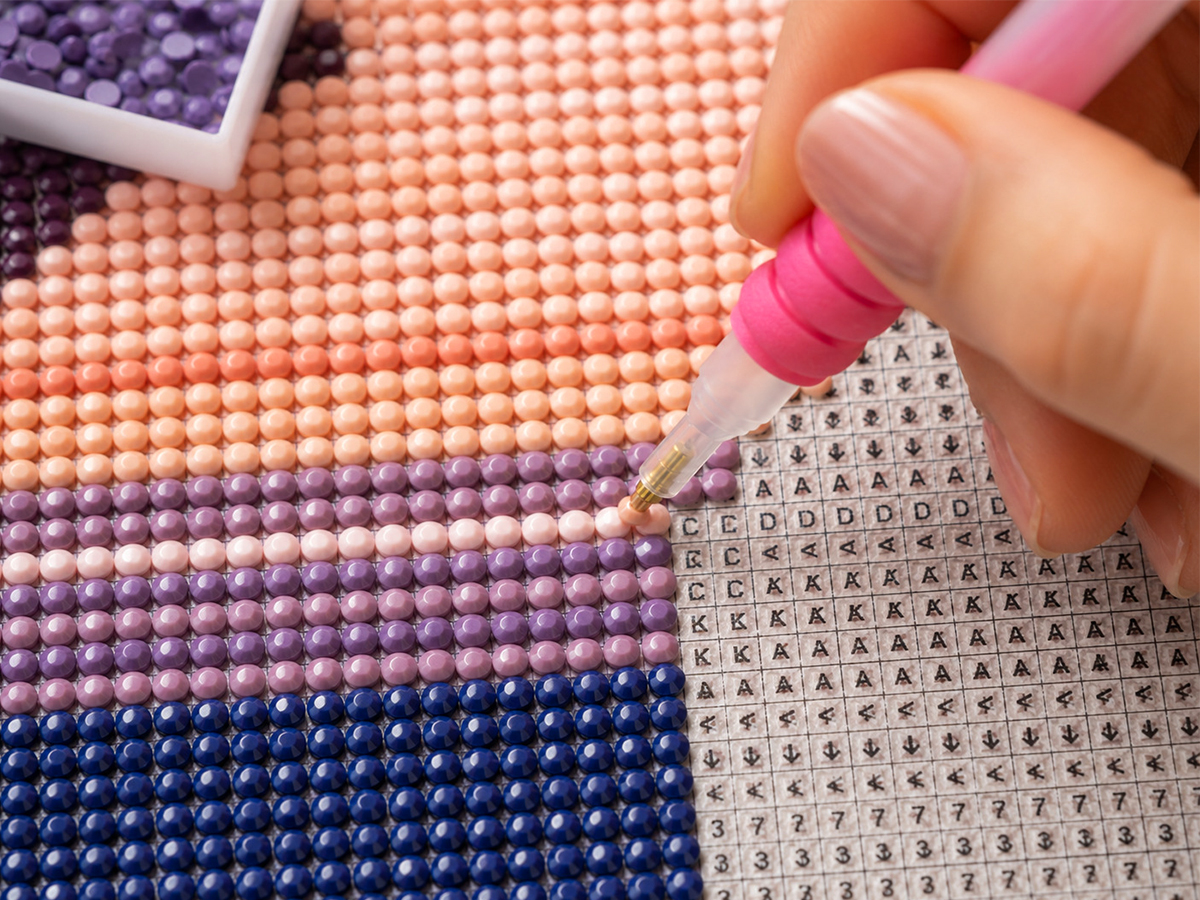
I’ve placed a lot of drills over the years, and the best diamond painting tips almost never come from a manual — they come from the mistakes you only make once. What follows is the shortlist I’d hand a friend who just opened their first kit: twenty concrete techniques, in the order you’ll actually need them, from setting up your table to sealing the finished piece. None of it is complicated. Most of it is about slowing down in the right places and letting the sparkle do the rest.
Setup & workspace
Half of a clean result is decided before you place a single drill. Get the light, the surface and the canvas right, and everything after it goes faster.
- Work in good light. A daylight (5000–6500K) lamp makes symbols easier to read and colours easier to match. Warm household bulbs make near-shades like cream and pale grey almost indistinguishable.
- Lay the canvas flat first. Roll it out and press it under books overnight, or warm it gently with a hairdryer on low, so it lies dead flat before you start. A domed canvas fights you for hours.
- Keep most of the film on. Peel back only a small section at a time — a hand’s width is plenty. Exposed glue attracts dust and dries out, and once it dulls, drills stop gripping.
- Use a non-slip surface. A craft mat, a silicone baking sheet, or a large hardback under the canvas keeps everything stable so your rows don’t drift.
Placing drills like a pro
This is where speed and neatness are won. If you take nothing else from this list, take the one-colour-at-a-time habit and the checkerboard edge.
- Shake the tray so drills settle flat-side down, facet-up and ready to lift. A gentle side-to-side beats tipping the whole tray.
- Work one colour at a time. It’s faster and it cuts mistakes dramatically — you stop re-reading the legend every few drills.
- Start at the bottom (or the top if you’re left-handed) so you’re never resting your hand on freshly placed, un-pressed areas.
- Keep a checkerboard edge when filling big single-colour areas. Placing alternating drills first gives every following drill two neighbours to line up against — it’s the real secret to straight rows.
- Press as you go. Every so often, lay the film back and press with a roller or book to bed drills firmly into the adhesive while it’s still tacky.
- Don’t overload the wax. A small amount on the pen tip is enough; too much leaves residue on the facets and dulls the shine our curated designs are chosen for.
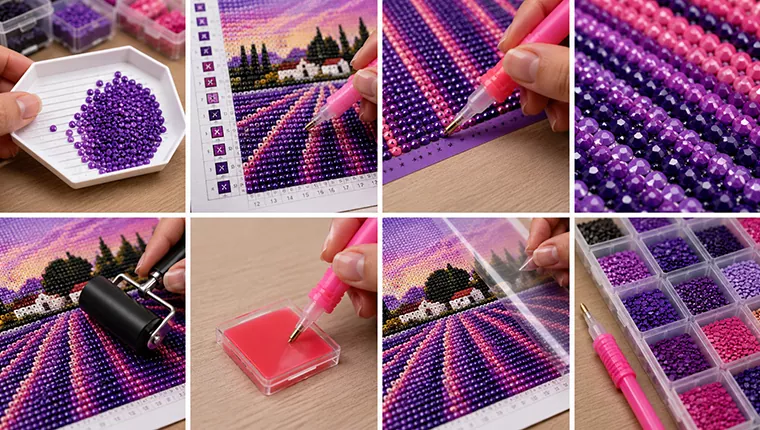
Straight rows aren’t luck — they’re the checkerboard trick plus a firm press every few minutes.
Square vs round, and multi-placer tools
People agonise over square versus round. Honestly, both look wonderful finished; the difference is how they feel to place and how crisp the edges read up close.
- Choose square for crisp, round for speed. Square drills tile edge-to-edge with a satisfying click and no gaps; round go on quicker and forgive a slightly off placement. See our how-to guide.
- Try a multi-placer for large single-colour areas — it lays a row of round drills at once. It works best with round drills and skies, less so on fiddly detail.
- Roll finished sections with a small brayer or rolling pin (over the film) to lock everything down before you move the canvas.
Avoiding common mistakes
These are the four that come up again and again in messages from makers. Every one is easy to dodge once you know it’s coming.
- Double-check the legend. Similar symbols trip everyone up — confirm the code before committing a big area, because unpicking a filled patch is nobody’s idea of relaxing.
- Don’t peel the whole canvas. The most common beginner error. Small sections only; the glue underneath is a consumable, and air is its enemy.
- Mind gaps and overlaps. Leave a hair of space so drills sit side-by-side, not stacked. If a row starts bulging, you’re crowding — ease off and reset the edge.
- Save your extras. Kits include spare drills — bag and label them by code for touch-ups. Run out entirely? Because our kits are colour-true, full-drill, the codes match exactly, and we resend replacement drills free, for life.
Finishing, sealing & storage
The last stretch is where a good canvas becomes a keepsake. Press, decide on sealing, and store the work-in-progress kindly between sessions.
- Press the whole piece flat when done, then consider a brush-on sealer for permanence and extra shine. Not sure whether to seal at all? Read how to seal a diamond painting first.
- Frame it, or mount it “floating.” Our metric kit sizes — 30×40, 40×50 and 50×60 cm, plus square 40×40 and 50×50 cm — map neatly onto common frames. Check the size guide before you buy the frame.
- Store works-in-progress rolled loosely or flat, film side up, away from heat and sunlight — never folded, which cracks the adhesive layer.
How long does a diamond painting take?
Longer than the box implies, and that’s the point. A 30×40 cm design is an easy few evenings; a 50×60 cm full-drill piece can run fifteen to twenty-five hours depending on colour count. Don’t measure it in hours, though — measure it in evenings you actually enjoyed. If your goal is calm as much as the finished art, our note on diamond painting for stress relief is worth a read, and choosing a size honestly up front saves the mid-project slump.
Enjoy the process
The best of all the diamond painting tips is the least technical: don’t rush. This craft rewards a relaxed pace, and the quiet is half of why we do it. Put on some music, peel back a small section, press firmly, and enjoy watching the sparkle spread one colour at a time. Do that, and a flawless finish stops being a goal and just becomes the way you work.
Keep reading: How to diamond paint (beginner’s guide) · How to seal a diamond painting · Size guide · Custom diamond painting guide
